Last week, I took the AZ-900 prep course and decided I wanted to test out some of the things I’ve learned. I’ve been looking into a tertiary backup strategy for some time and decided this would be a good opportunity to combine both efforts into a solution. I compared the pricing for Azure and AWS and ultimately went with Azure – it also makes sense because at this moment, for me, Azure is more relevant professionally.
Objective: Create a backup of my lab NAS (Synology DS418 to Azure)
Initially, I planned on using AzCopy or some other type of raw upload to perform this task, but as I did more research, I found that the most logical step was to leverage Synology’s capabilities to do it for me. Normally, I’m pretty skeptical of using an app to do something like this, but since the app used is created and maintained by Synology, I felt comfortable using it. I’ll highlight any differences, but for most of the process I followed the steps in the following two articles:
Below are some of the differences I encountered. Some are the result of newer settings in Azure that weren't available when the guides were written. Others are my personal configurations:
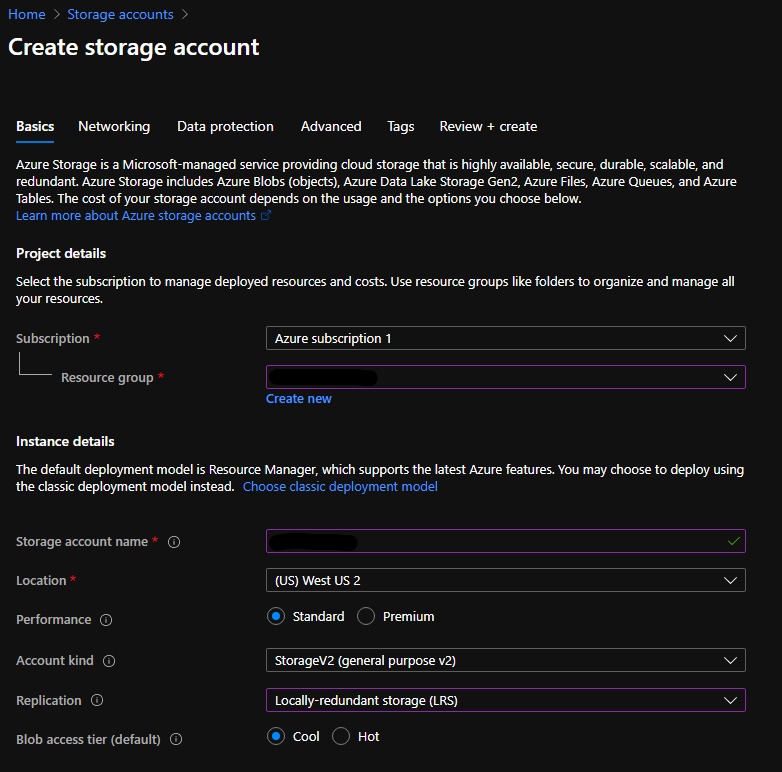
- Selected a region closer to me, but not the same region that I am in.
- Selected Locally Redundant Storage (LRS) instead of the author’s RA-GRS. This provides less redundancy but is more affordable for a home lab.
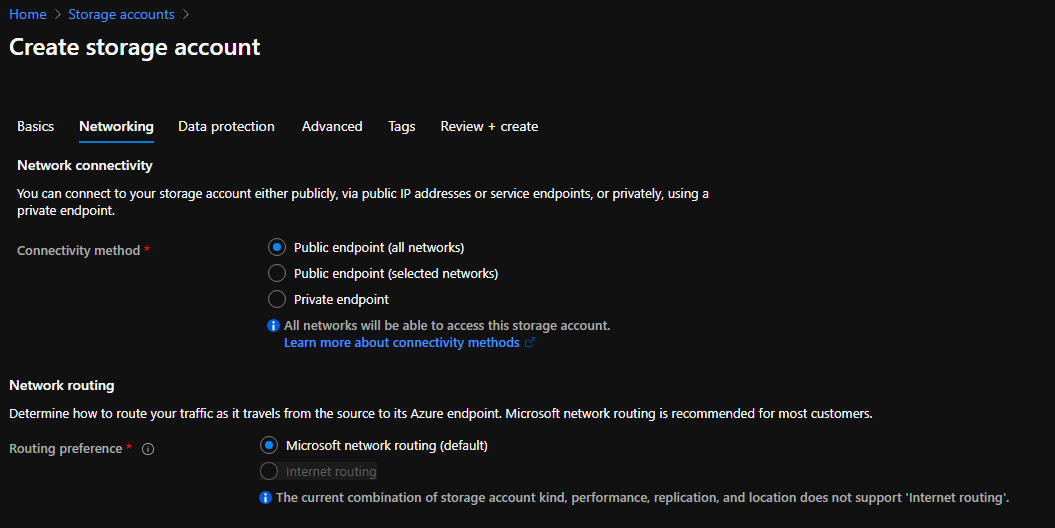
- Networks: Not present in the guide. I chose to go with the Public Endpoint (all networks). Any other configuration would require a VPN connection and although I plan on doing that someday, it isn’t today.
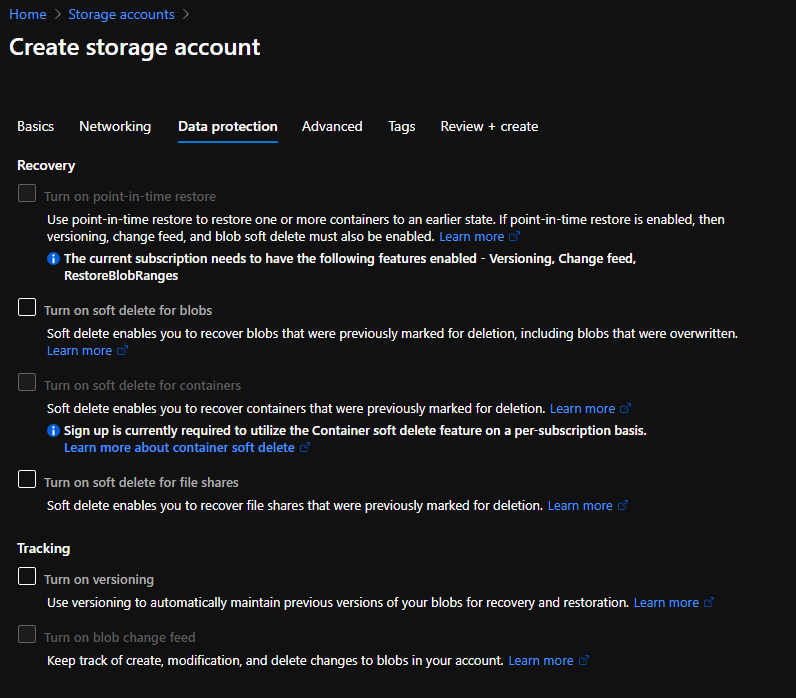
- Data protection: Not present in the guide. I did not enable any of the data protection options. Enabling the options (soft delete, versioning, etc.) increases cost since the soft deleted data is billed at the same rate as active data. My back of the napkin risk assessment says this is overkill for my home lab.
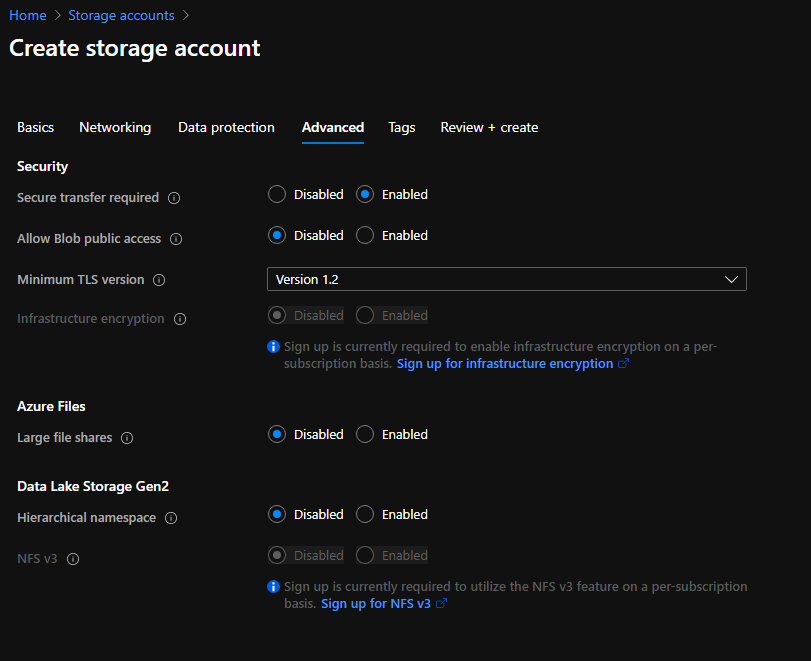
- Advanced: Not present in the guide. I disabled the ‘Allow blob public access’ setting, which to my understanding allows anonymous access (after configuring some ACLs). I don’t have any intention of doing this so just disabled it. I set the minimum TLS version to 1.2 (highest available at the time of this writing). I left the rest of the options disabled.
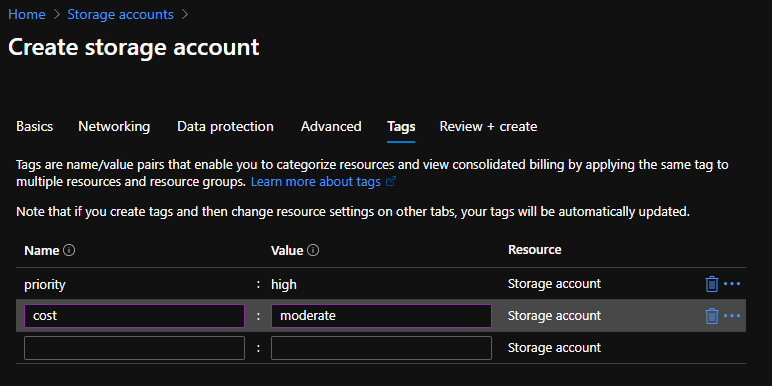
- Tags: I added my custom tags I use to track and organize resources.

- Initially had an issue downloading the Hyper Backup app (determined it was a firewall rule blocking it – I employ a deny by default policy in my lab so I created a temp rule to allow HTTPS out)

- I decided to create a storage container to make it easier to distinguish between my backups. This may or may not be necessary, but I’m still learning Azure.
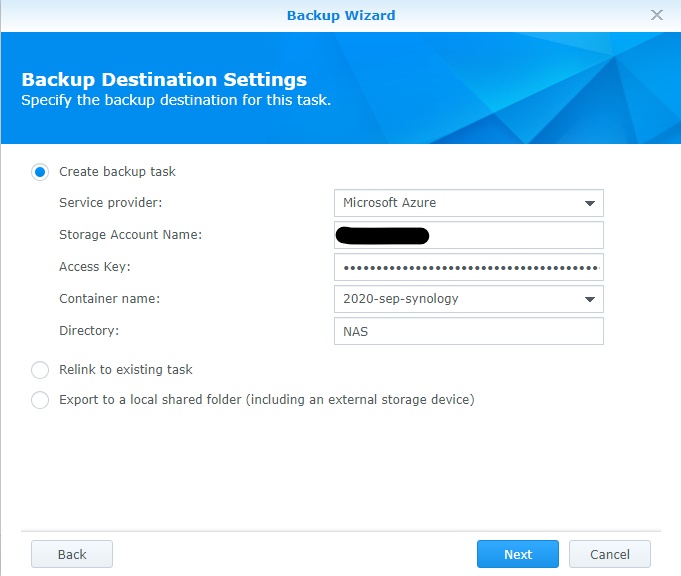
- After entering the storage account name and the access key (I used key 1), the container name populated by itself.
- This was noted in one of the guides, but not the other. Neither specified which key to use – I’m not sure it matters.
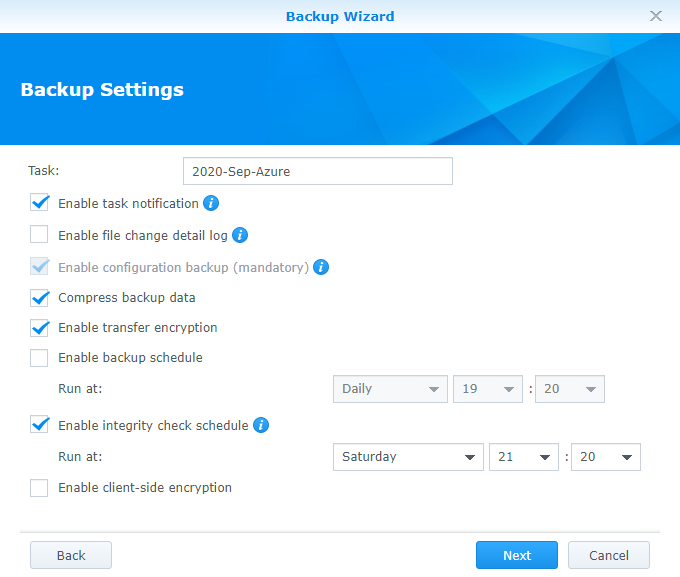
- My settings are a bit of a mix between the two guides. I chose to not make the backup recurring since my objective is a one-time backup. I’m going to measure cost and determine if it’s feasible to perform regular backups.
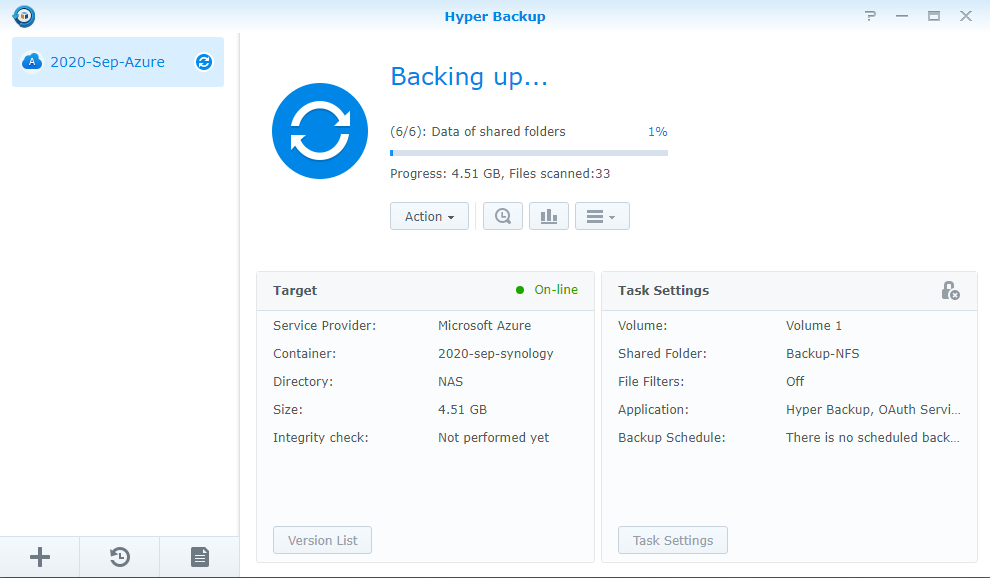
- We are on the way! I chose not to back up an NFS share where I have current VMs running (I am backing up up their backups). So, the transfer ended up being a bit smaller than expected.


